> ## Documentation Index
> Fetch the complete documentation index at: https://docs.shipmobilefast.com/llms.txt
> Use this file to discover all available pages before exploring further.

# Google OAuth IOS

> Implement OAuth authentication

# Sign in with Google on Expo React Native IOS

First make sure you have completed the [Google OAuth Web](/auth/oauth/google/web) page.

* We need Supabase to be setup.

<Steps>
  <Step>
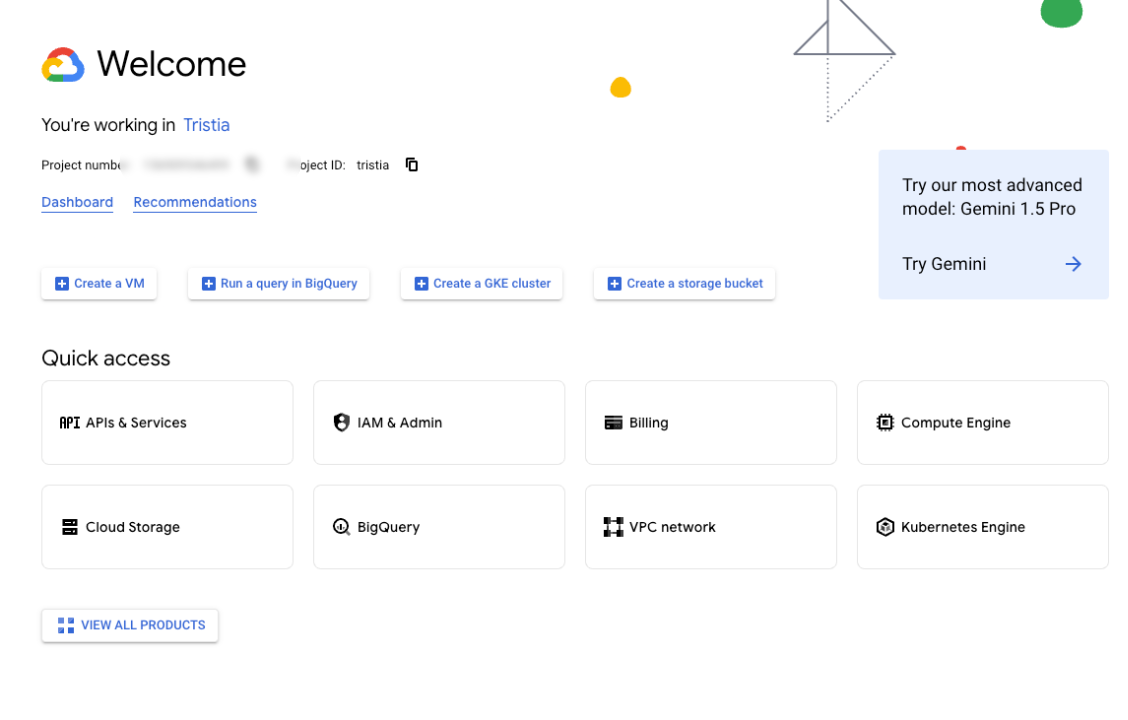
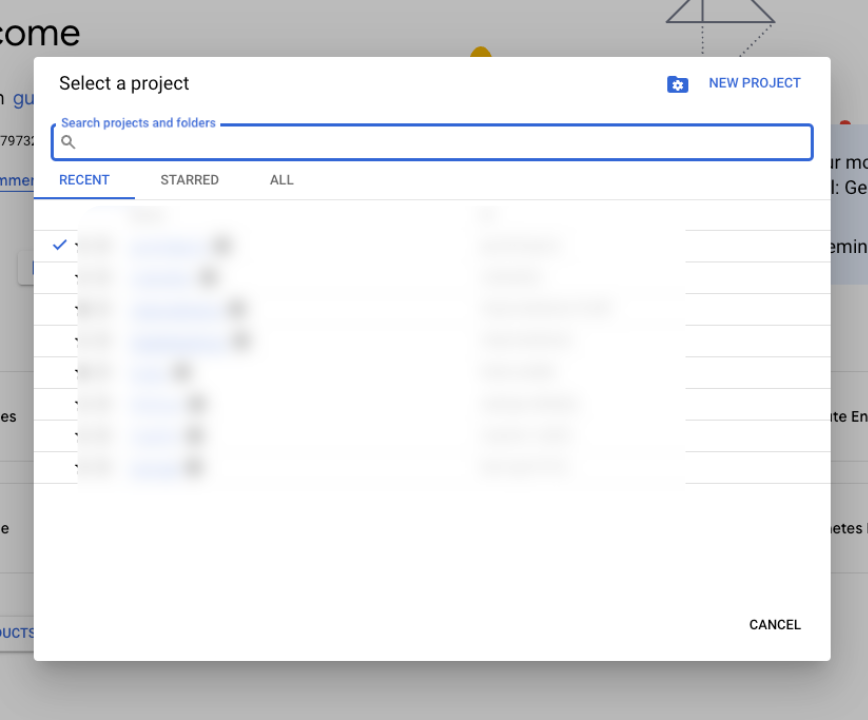
    First of all, you need to create a new project in the Google Cloud Console if you don't have one already.

    * We created a new project in [RevenueCat Integration Android](/monetization/in-app-purchases/android) page.
      If you want you can follow this first.
    <Frame>
      <img src="https://mintcdn.com/shipmobilefast-51a499dc/0OITnrSFpxUQjTf4/images/setup/googleoauth/ios/step1.png?fit=max&auto=format&n=0OITnrSFpxUQjTf4&q=85&s=d7de9156d30b87155329da7636e08e68" alt="Step 1" className="w-full h-full rounded-xl" width="868" height="720" data-path="images/setup/googleoauth/ios/step1.png" />
    </Frame>
  </Step>

  <Step>
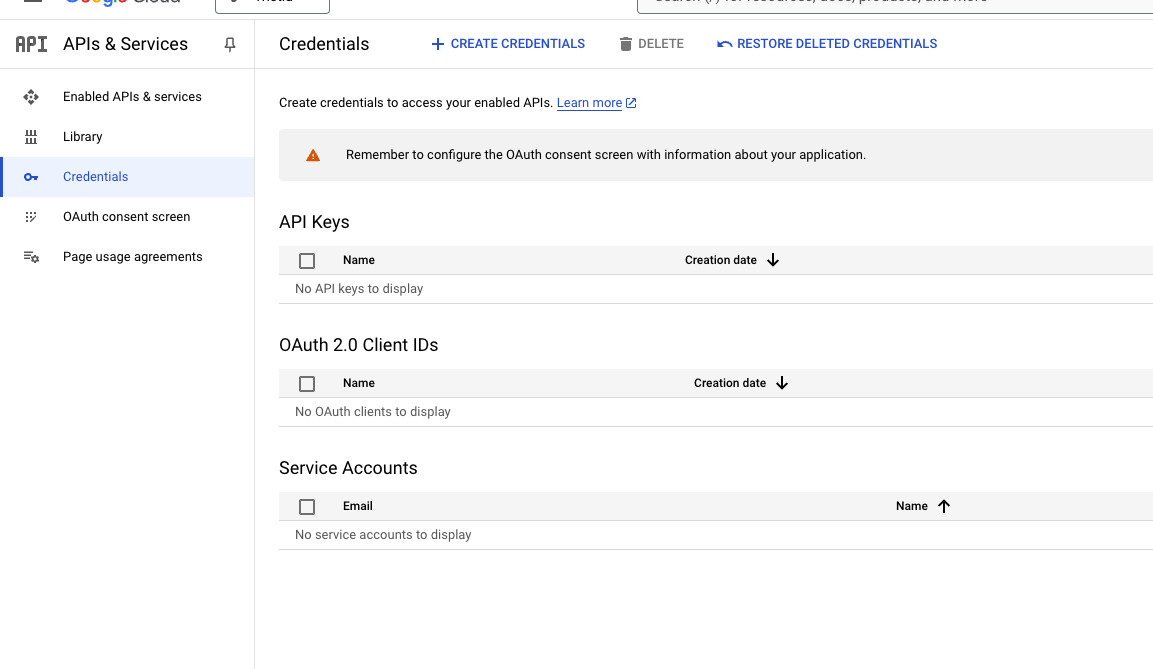
    Click the `APIs & Services` menu.

    <Frame>
      <img src="https://mintcdn.com/shipmobilefast-51a499dc/0OITnrSFpxUQjTf4/images/setup/googleoauth/ios/step2.png?fit=max&auto=format&n=0OITnrSFpxUQjTf4&q=85&s=5fd9ce27731979d5e5e0ad083d308108" alt="Step 2" className="w-full h-full rounded-xl" width="1128" height="720" data-path="images/setup/googleoauth/ios/step2.png" />
    </Frame>
  </Step>

  <Step>
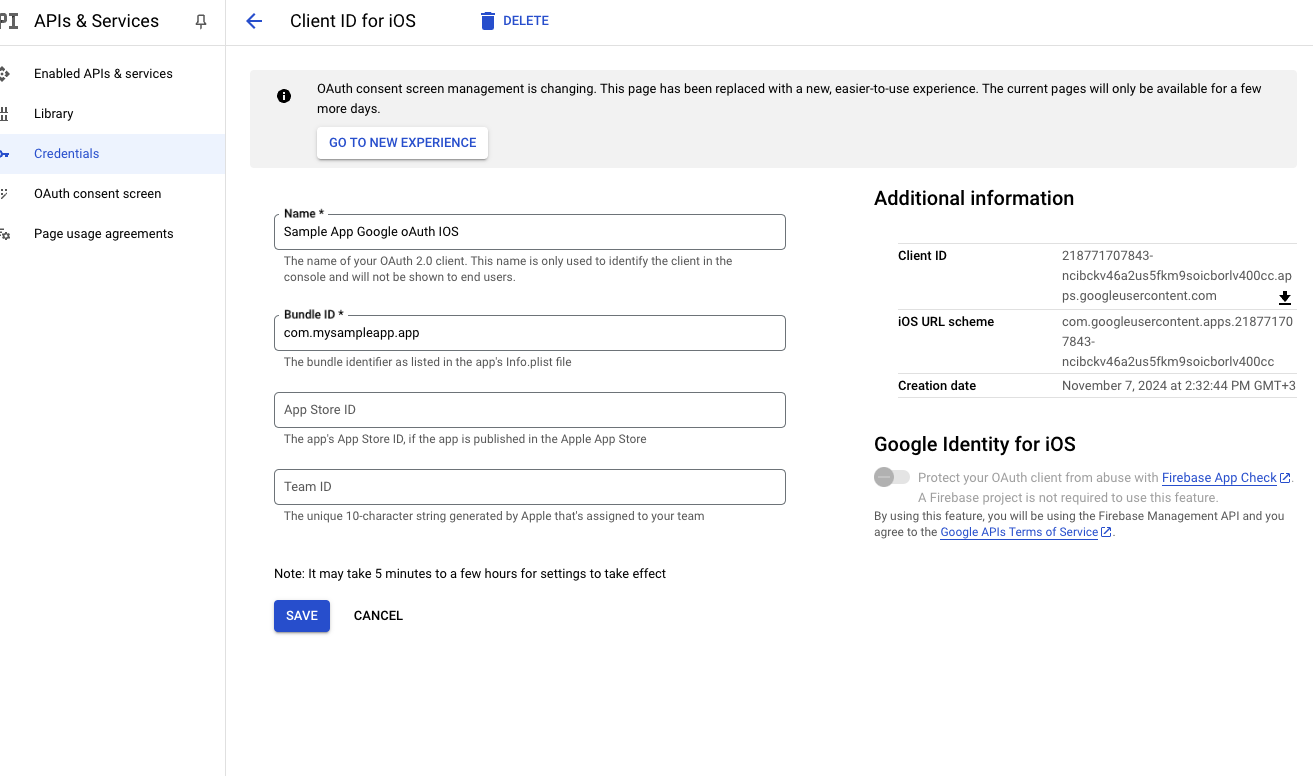
    Click the `Credentials` menu.

    <Frame>
      <img src="https://mintcdn.com/shipmobilefast-51a499dc/0OITnrSFpxUQjTf4/images/setup/googleoauth/ios/step3.png?fit=max&auto=format&n=0OITnrSFpxUQjTf4&q=85&s=5f903c368abd1581c8d7ade7bfba269e" alt="Step 3" className="w-full h-full rounded-xl" width="1153" height="669" data-path="images/setup/googleoauth/ios/step3.png" />
    </Frame>
  </Step>

  <Step>
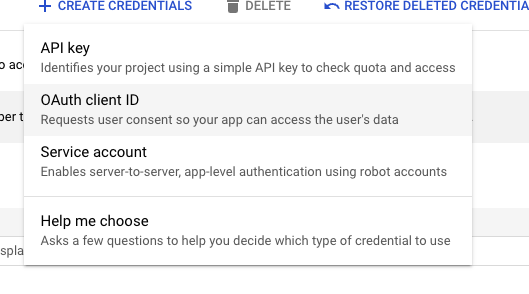
    Then click the `Create Credentials` button.

    * Please select `OAuth client ID`
    <Frame>
      <img src="https://mintcdn.com/shipmobilefast-51a499dc/0OITnrSFpxUQjTf4/images/setup/googleoauth/ios/step4.png?fit=max&auto=format&n=0OITnrSFpxUQjTf4&q=85&s=ebb7b0805cb2f3265620a41b192a7091" alt="Step 4" className="w-full h-full rounded-xl" width="529" height="294" data-path="images/setup/googleoauth/ios/step4.png" />
    </Frame>
  </Step>

  <Step>
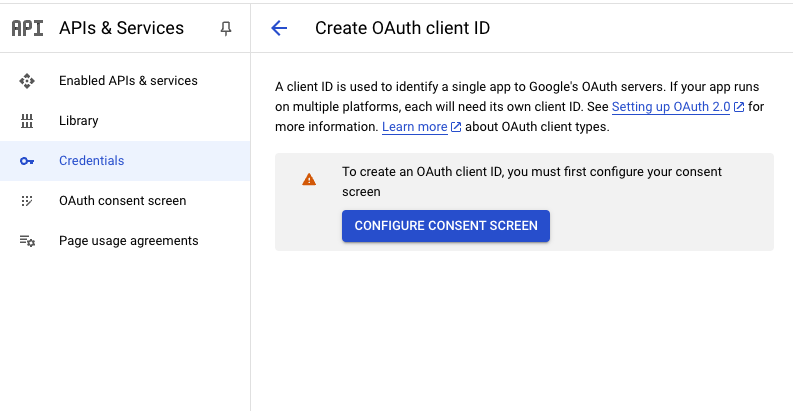
    But you need to `Configure Consent Screen` first.
    <Frame>
      <img src="https://mintcdn.com/shipmobilefast-51a499dc/0OITnrSFpxUQjTf4/images/setup/googleoauth/ios/step5.png?fit=max&auto=format&n=0OITnrSFpxUQjTf4&q=85&s=6eb04fe9c3225931c4d2ec112d9fb395" alt="Step 5" className="w-full h-full rounded-xl" width="793" height="411" data-path="images/setup/googleoauth/ios/step5.png" />
    </Frame>
  </Step>

  <Step>
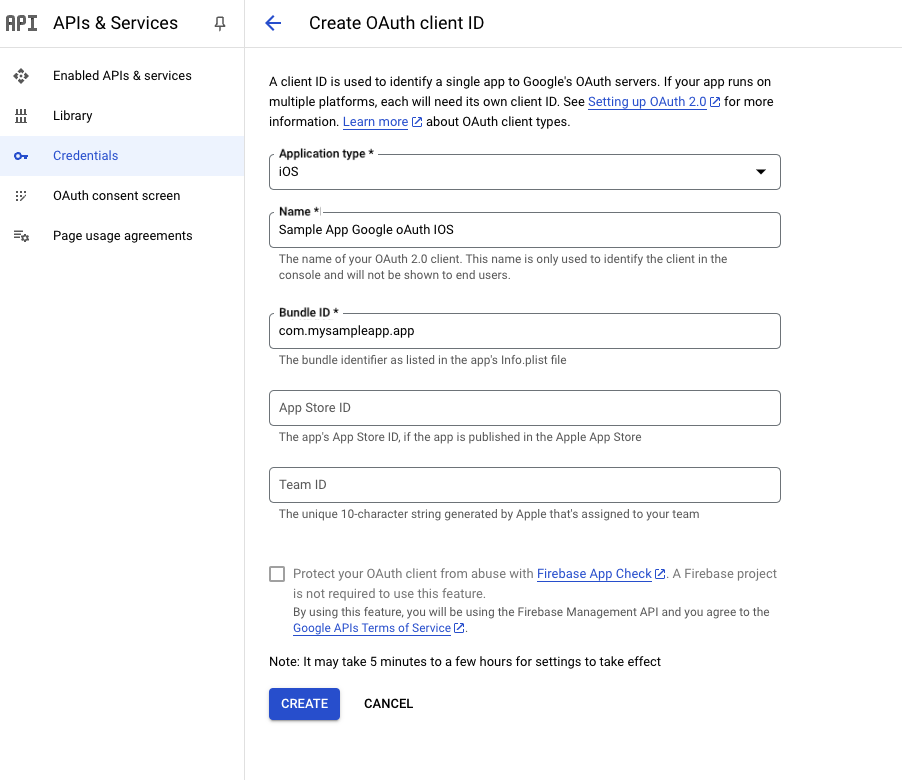
    Create IOS oauth client id.

    * Write a name of your app.
    * Write your `bundle id` in the `Bundle ID` field.
    * Click the `Create` button.
          <Frame>
            <img src="https://mintcdn.com/shipmobilefast-51a499dc/0OITnrSFpxUQjTf4/images/setup/googleoauth/ios/step6.png?fit=max&auto=format&n=0OITnrSFpxUQjTf4&q=85&s=e35b4bfc4d91589a9622af1f96f650bc" alt="Step 6" className="w-full h-full rounded-xl" width="902" height="780" data-path="images/setup/googleoauth/ios/step6.png" />
          </Frame>
  </Step>

  <Step>
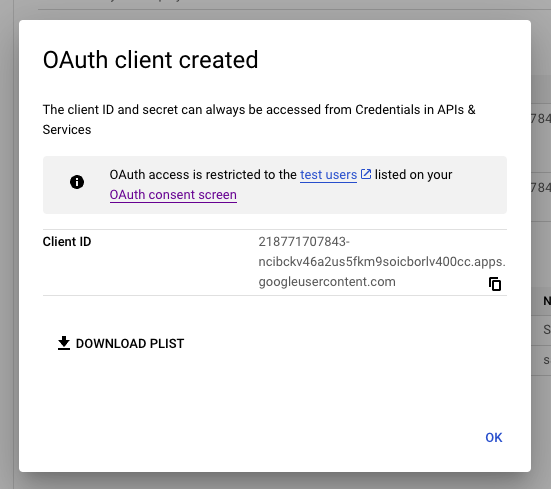
    Copy Client ID and Paste it to the `.env` file.
    <Frame>
      <img src="https://mintcdn.com/shipmobilefast-51a499dc/0OITnrSFpxUQjTf4/images/setup/googleoauth/ios/step7.png?fit=max&auto=format&n=0OITnrSFpxUQjTf4&q=85&s=9f68543f6beea4c122e062ecfe6d7fef" alt="Step 7" className="w-full h-full rounded-xl" width="551" height="489" data-path="images/setup/googleoauth/ios/step7.png" />
    </Frame>

    ```{1} theme={null}
        EXPO_PUBLIC_GOOGLE_OAUTH_IOS_CLIENT_ID=some-id.apps.googleusercontent.com
    ```
  </Step>

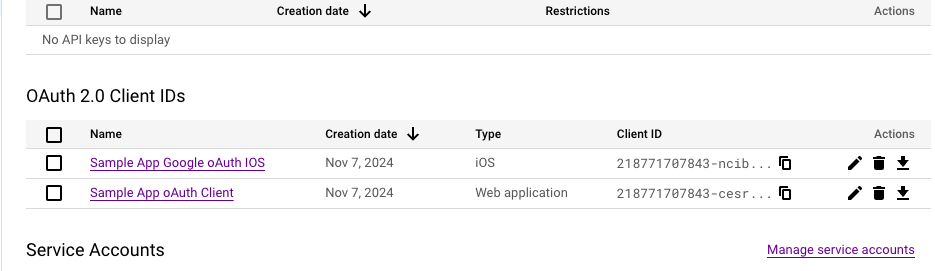
  <Step>
    Then you need to select `IOS oAuth Client` first.
    <Frame>
      <img src="https://mintcdn.com/shipmobilefast-51a499dc/0OITnrSFpxUQjTf4/images/setup/googleoauth/ios/step8.png?fit=max&auto=format&n=0OITnrSFpxUQjTf4&q=85&s=0eec43ff3090d503b1ca2459fa7a4ceb" alt="Step 8" className="w-full h-full rounded-xl" width="935" height="271" data-path="images/setup/googleoauth/ios/step8.png" />
    </Frame>
  </Step>

  <Step>
    <Frame>
      <img src="https://mintcdn.com/shipmobilefast-51a499dc/0OITnrSFpxUQjTf4/images/setup/googleoauth/ios/step9.png?fit=max&auto=format&n=0OITnrSFpxUQjTf4&q=85&s=f6d8056380eb1d7c5f1d483c372d5770" alt="Step 9" className="w-full h-full rounded-xl" width="1313" height="776" data-path="images/setup/googleoauth/ios/step9.png" />
    </Frame>

    Copy `IOS URL Scheme` and go to `app.json` file.

    * Add here:

    ```{4} theme={null}
       [
        "@react-native-google-signin/google-signin",
        {
          "iosUrlScheme": "com.googleusercontent.apps.some-id" // Here
        }
      ]
    ```

    <Check>
      You have successfully set up Google OAuth for your Expo React Native IOS Client. 🎉
    </Check>

    <Tip>
      Go and setup Android OAuth.
    </Tip>
  </Step>
</Steps>

<CardGroup>
  <Card title="Google OAuth Web" icon="apple" href="/auth/oauth/google/web">
    Please click here for Google OAuth Web.
  </Card>

  <Card title="Google OAuth Android" icon="android" href="/auth/oauth/google/android">
    Please click here for Google OAuth Android.
  </Card>
</CardGroup>