> ## Documentation Index
> Fetch the complete documentation index at: https://docs.shipmobilefast.com/llms.txt
> Use this file to discover all available pages before exploring further.
# Quickstart w/ StyleSheet
> Let's get you started in 5 minutes.
 First, make sure you set up your development environment.
## Super Fast Resources for Shipping:
For AI Logo Creator:
First, make sure you set up your development environment.
## Super Fast Resources for Shipping:
For AI Logo Creator:
 For Email SMTP Service:
 Brevo
### Then, we are ready to clone the repo.
#### Open your terminal and run the following command:
```bash theme={null}
git clone https://github.com/shipmobilefast/shipmobilefast.git [your-project-name]
```
```bash theme={null}
git clone https://github.com/shipmobilefast/shipmobilefast-pro.git [your-project-name]
```
```bash theme={null}
cd [your-project-name]
```
```bash theme={null}
npm install
```
```bash theme={null}
yarn install
```
```bash theme={null}
pnpm install
```
```bash theme={null}
bun install
```
```bash theme={null}
git remote remove origin
```
Now we are ready to start the development server. But don't start it yet.
### That's it! Our app is ready to be built.
But we are not done yet. We need to set up the app.json file.
First open your `app.json` file and find these lines:
```json app.json theme={null}
{
"expo": {
"name": "My App",
"slug": "my-app",
"scheme": "com.myapp.app",
...
"ios": {
...
"associatedDomains": ["applinks:myapp.com"],
"bundleIdentifier": "com.myapp.app",
...
},
"android": {
...
"package": "com.myapp.app",
...
"intentFilters": [
{
...
"data": [
{
"scheme": "https",
"host": "myapp.com",
},
{
"scheme": "com.myapp.app"
}
],
}
]
},...
}
```
Find an app name for yourself. For example: `Ship Mobile Fast`.
Then create a slug for your app. For example: `ship-mobile-fast`.
Then create a bundle identifier for your app. For example: `com.shipmobilefast.app`.
I am using both same like: `com.shipmobilefast.app`.
Then replace the values with your own.
Result should look like this:
I am using `shipmobilefast.com` as my domain. If you don't have one, you can delete the `associatedDomains` and `data` sections.
```json {2-5} app.json theme={null}
"data": [
{
"scheme": "https",
"host": "shipmobilefast.com",
},
// Don't delete this one 👇
{
"scheme": "com.shipmobilefast.app"
}
]
```
```json theme={null}
{
"expo": {
"name": "Ship Mobile Fast",
"slug": "ship-mobile-fast",
"scheme": "com.shipmobilefast.app",
...
"ios": {
...
"associatedDomains": ["applinks:shipmobilefast.com"],
"bundleIdentifier": "com.shipmobilefast.app",
...
},
"android": {
...
"package": "com.shipmobilefast.app",
...
"intentFilters": [
{
...
"data": [
{
"scheme": "https",
"host": "shipmobilefast.com",
},
{
"scheme": "com.shipmobilefast.app"
}
],
}
]
},
...
}
```
## Supabase
### Now we need to set up Supabase.
```bash theme={null}
cp .env.example .env
```
Now we need to set up the environment variables one by one. Start with [Supabase](https://supabase.com/).
Brevo
### Then, we are ready to clone the repo.
#### Open your terminal and run the following command:
```bash theme={null}
git clone https://github.com/shipmobilefast/shipmobilefast.git [your-project-name]
```
```bash theme={null}
git clone https://github.com/shipmobilefast/shipmobilefast-pro.git [your-project-name]
```
```bash theme={null}
cd [your-project-name]
```
```bash theme={null}
npm install
```
```bash theme={null}
yarn install
```
```bash theme={null}
pnpm install
```
```bash theme={null}
bun install
```
```bash theme={null}
git remote remove origin
```
Now we are ready to start the development server. But don't start it yet.
### That's it! Our app is ready to be built.
But we are not done yet. We need to set up the app.json file.
First open your `app.json` file and find these lines:
```json app.json theme={null}
{
"expo": {
"name": "My App",
"slug": "my-app",
"scheme": "com.myapp.app",
...
"ios": {
...
"associatedDomains": ["applinks:myapp.com"],
"bundleIdentifier": "com.myapp.app",
...
},
"android": {
...
"package": "com.myapp.app",
...
"intentFilters": [
{
...
"data": [
{
"scheme": "https",
"host": "myapp.com",
},
{
"scheme": "com.myapp.app"
}
],
}
]
},...
}
```
Find an app name for yourself. For example: `Ship Mobile Fast`.
Then create a slug for your app. For example: `ship-mobile-fast`.
Then create a bundle identifier for your app. For example: `com.shipmobilefast.app`.
I am using both same like: `com.shipmobilefast.app`.
Then replace the values with your own.
Result should look like this:
I am using `shipmobilefast.com` as my domain. If you don't have one, you can delete the `associatedDomains` and `data` sections.
```json {2-5} app.json theme={null}
"data": [
{
"scheme": "https",
"host": "shipmobilefast.com",
},
// Don't delete this one 👇
{
"scheme": "com.shipmobilefast.app"
}
]
```
```json theme={null}
{
"expo": {
"name": "Ship Mobile Fast",
"slug": "ship-mobile-fast",
"scheme": "com.shipmobilefast.app",
...
"ios": {
...
"associatedDomains": ["applinks:shipmobilefast.com"],
"bundleIdentifier": "com.shipmobilefast.app",
...
},
"android": {
...
"package": "com.shipmobilefast.app",
...
"intentFilters": [
{
...
"data": [
{
"scheme": "https",
"host": "shipmobilefast.com",
},
{
"scheme": "com.shipmobilefast.app"
}
],
}
]
},
...
}
```
## Supabase
### Now we need to set up Supabase.
```bash theme={null}
cp .env.example .env
```
Now we need to set up the environment variables one by one. Start with [Supabase](https://supabase.com/).
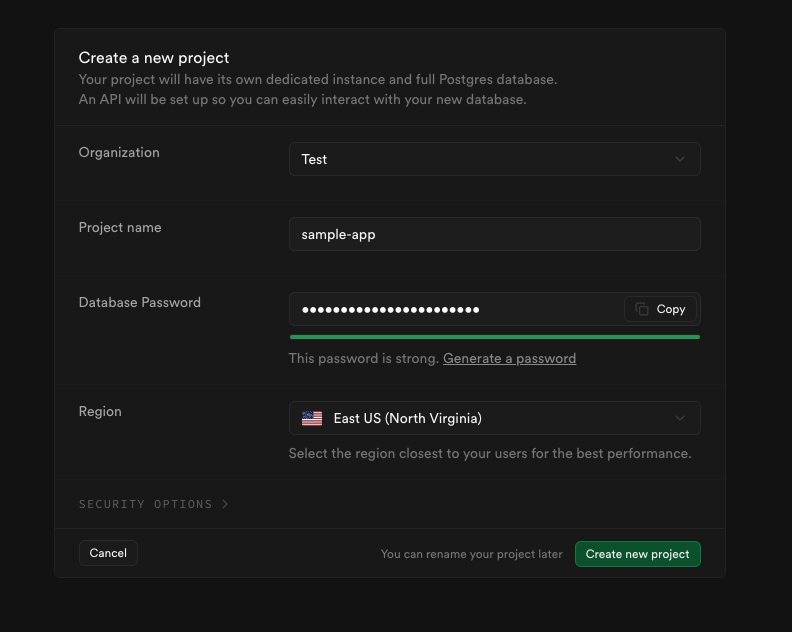 Copy the `URL` and `ANON KEY` and paste them into the `.env` file.
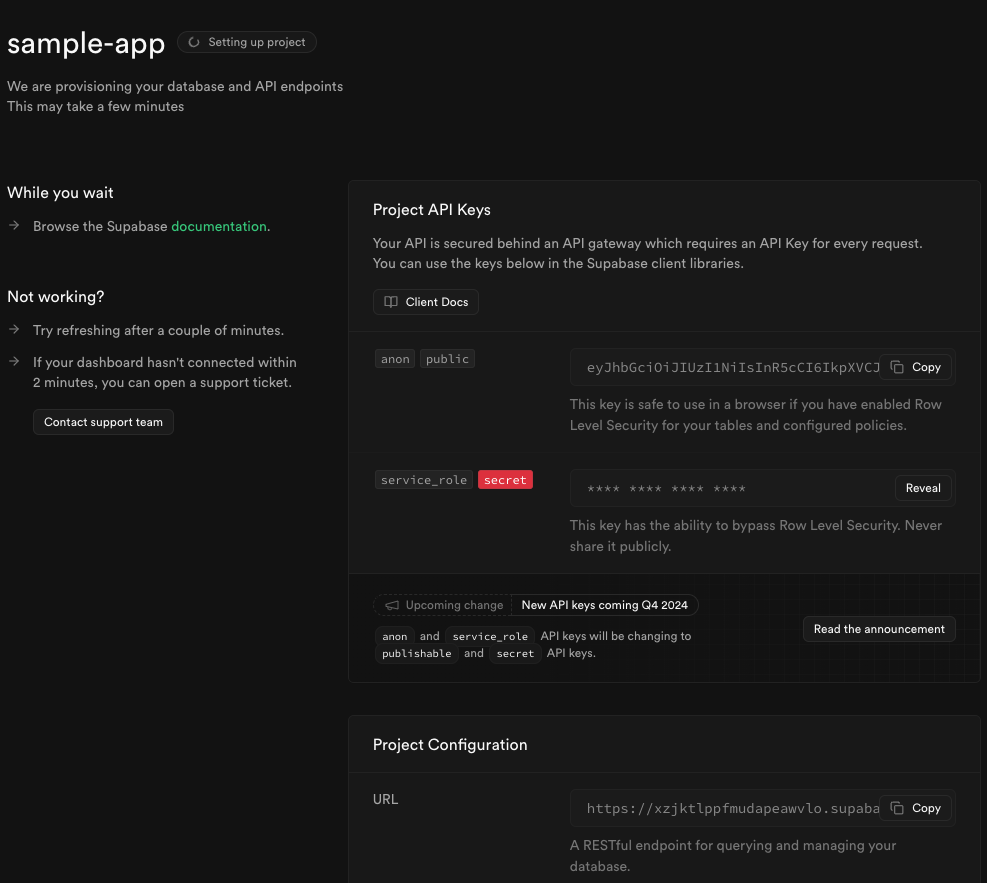 Warning 1: Don't forget to check `.env` file in the `.gitignore` file.
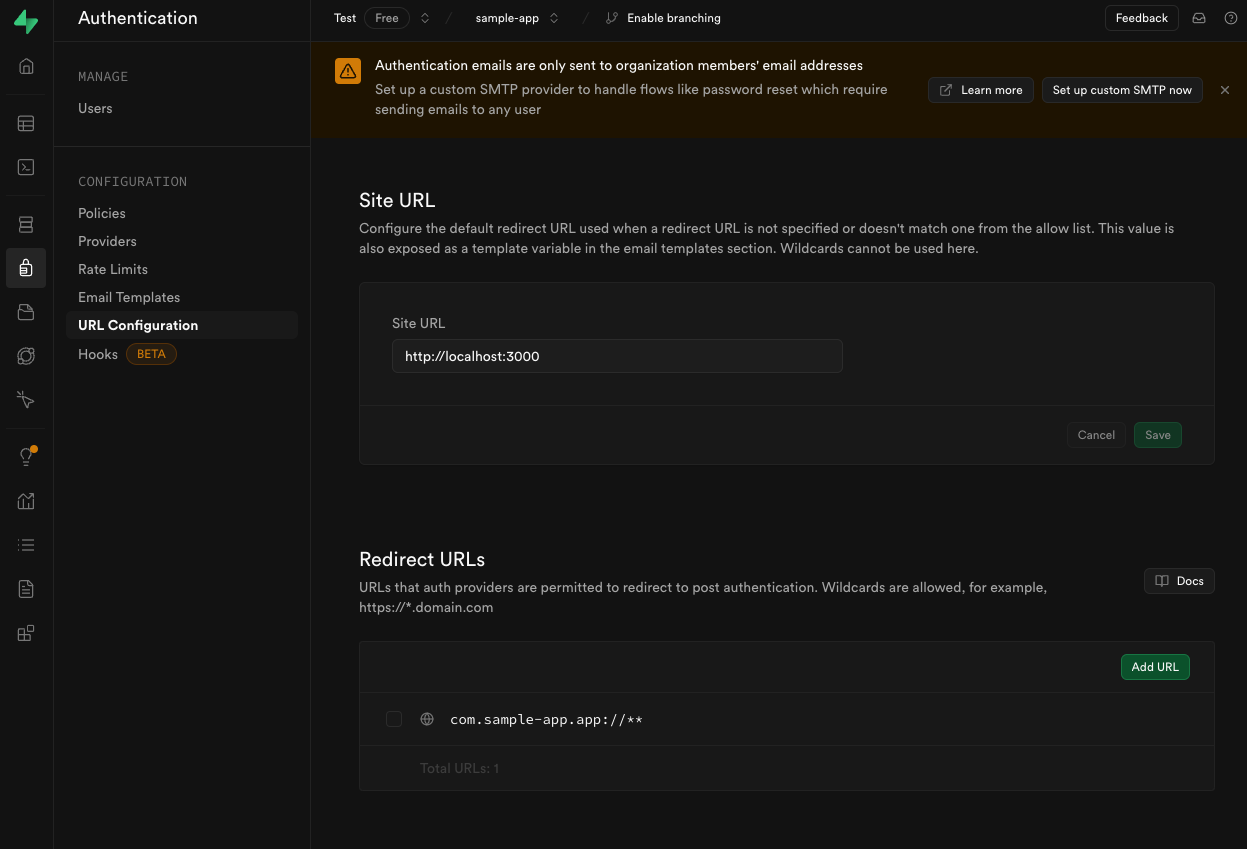
Warning 2: I strongly recommend to set up your own SMTP server. For example: [Brevo](https://brevo.com/). It is free up to 300 emails per day.
I am using it in all my projects.
You can use [Resend](https://resend.com/) too. It's free 100 emails per day.
Now go to the Authentication section and add your app id: like: `com.shipmobilefast.app`.
Warning 1: Don't forget to check `.env` file in the `.gitignore` file.
Warning 2: I strongly recommend to set up your own SMTP server. For example: [Brevo](https://brevo.com/). It is free up to 300 emails per day.
I am using it in all my projects.
You can use [Resend](https://resend.com/) too. It's free 100 emails per day.
Now go to the Authentication section and add your app id: like: `com.shipmobilefast.app`.
 Now open your codebase and let's start your app.
1. Open your terminal and run the following command:
```bash theme={null}
// WITH EAS
eas build --profile development --platform ios
```
```bash theme={null}
// WITHOUT EAS
npx expo prebuild
npx expo run:ios
// or
npx expo run:android
```
Probably you will see the error.
eas.json must be created.
Open your codebase and create `eas.json` file.
Add this code into `eas.json` file:
```json eas.json {5-7} theme={null}
"build": {
"development": {
"developmentClient": true,
"distribution": "internal",
"ios": {
"simulator": true
}
},
```
Now run the following command again:
```bash theme={null}
eas build --profile development --platform ios
```
Now your app is ready to be built. 🎉
```bash theme={null}
npx expo start
```
### Troubleshooting
#### If you don't set your Supabase URL and ANON KEY in the `.env` file, you will see an error.
Now open your codebase and let's start your app.
1. Open your terminal and run the following command:
```bash theme={null}
// WITH EAS
eas build --profile development --platform ios
```
```bash theme={null}
// WITHOUT EAS
npx expo prebuild
npx expo run:ios
// or
npx expo run:android
```
Probably you will see the error.
eas.json must be created.
Open your codebase and create `eas.json` file.
Add this code into `eas.json` file:
```json eas.json {5-7} theme={null}
"build": {
"development": {
"developmentClient": true,
"distribution": "internal",
"ios": {
"simulator": true
}
},
```
Now run the following command again:
```bash theme={null}
eas build --profile development --platform ios
```
Now your app is ready to be built. 🎉
```bash theme={null}
npx expo start
```
### Troubleshooting
#### If you don't set your Supabase URL and ANON KEY in the `.env` file, you will see an error.
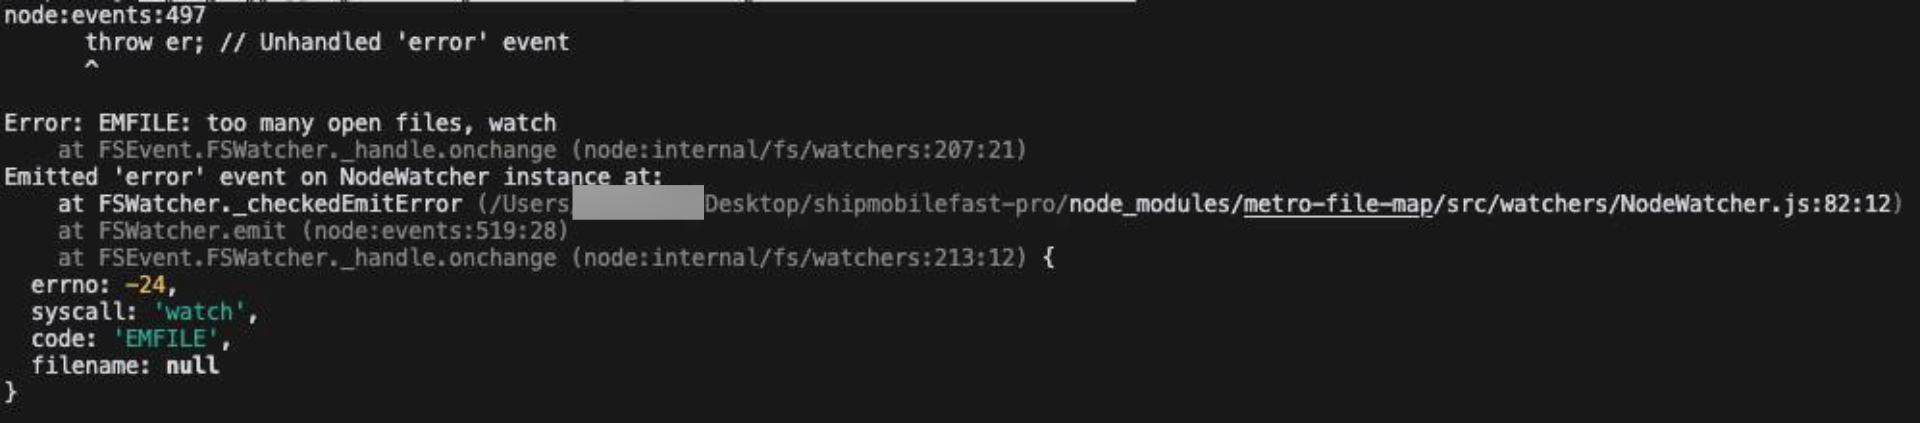 ```bash theme={null}
watchman watch-del-all
```
If you are using macOS, you can also install `watchman` using Homebrew.
```bash theme={null}
brew install watchman
```
```bash theme={null}
watchman watch-del-all
```
If you are using macOS, you can also install `watchman` using Homebrew.
```bash theme={null}
brew install watchman
```