First, make sure you set up your development environment.
Super Fast Resources for Shipping:
For AI Logo Creator:
For Email SMTP Service: Brevo
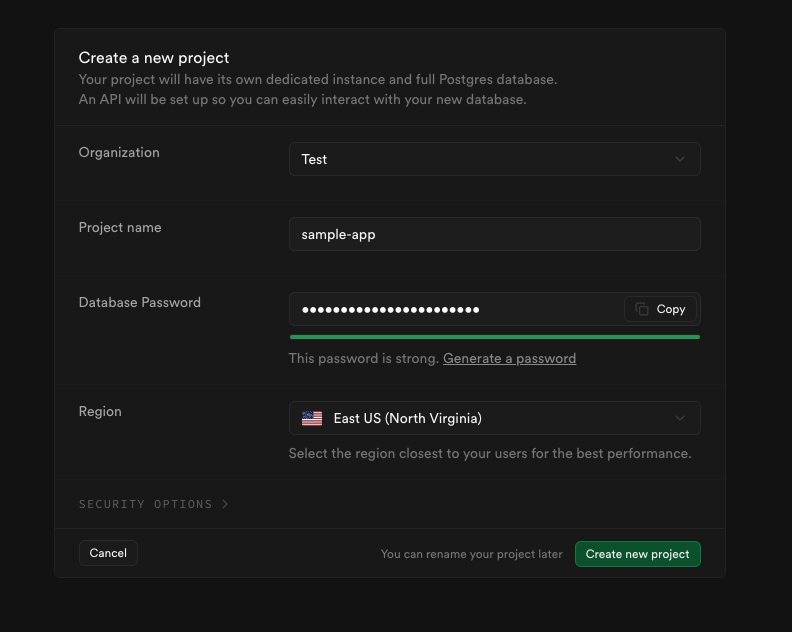
Brevo First, you need to create your Supabase project.
Open your terminal and run the following command:
git clone https://github.com/shipmobilefast/shipmobilefast-pro.git [your-project-name]
Don’t start before you finish the Supabase setup.
Warning: Google Sign In, In App Purchase, Admob, and some features will not work.After you develop your app, you should create a development build or eas build for these features.
But we are not done yet. We need to set up the app.json file.
First open your app.json file and find these lines: {
"expo": {
"name": "My App",
"slug": "my-app",
"scheme": "com.myapp.app",
...
"ios": {
...
"associatedDomains": ["applinks:myapp.com"],
"bundleIdentifier": "com.myapp.app",
...
},
"android": {
...
"package": "com.myapp.app",
...
"intentFilters": [
{
...
"data": [
{
"scheme": "https",
"host": "myapp.com",
},
{
"scheme": "com.myapp.app"
}
],
}
]
},...
}
Find an app name for yourself. For example: Ship Mobile Fast.
Then create a slug for your app. For example: ship-mobile-fast.
Then create a bundle identifier for your app. For example: com.shipmobilefast.app.I am using both same like: com.shipmobilefast.app.
Then replace the values with your own.
Result should look like this:I am using shipmobilefast.com as my domain. If you don’t have one, you can delete the associatedDomains and data sections. "data": [
{
"scheme": "https",
"host": "shipmobilefast.com",
},
// Don't delete this one 👇
{
"scheme": "com.shipmobilefast.app"
}
]
  {
    "expo": {
      "name": "Ship Mobile Fast",
    "slug": "ship-mobile-fast",
    "scheme": "com.shipmobilefast.app",
    ...
    "ios": {
      ...
      "associatedDomains": ["applinks:shipmobilefast.com"],
      "bundleIdentifier": "com.shipmobilefast.app",
      ...
    },
    "android": {
      ...
      "package": "com.shipmobilefast.app",
      ...
      "intentFilters": [
        {
          ...
          "data": [
            {
              "scheme": "https",
              "host": "shipmobilefast.com",
            },
            {
              "scheme": "com.shipmobilefast.app"
            }
          ],
        }
      ]
    },
    ...
  }
Supabase
Now we need to set up Supabase.
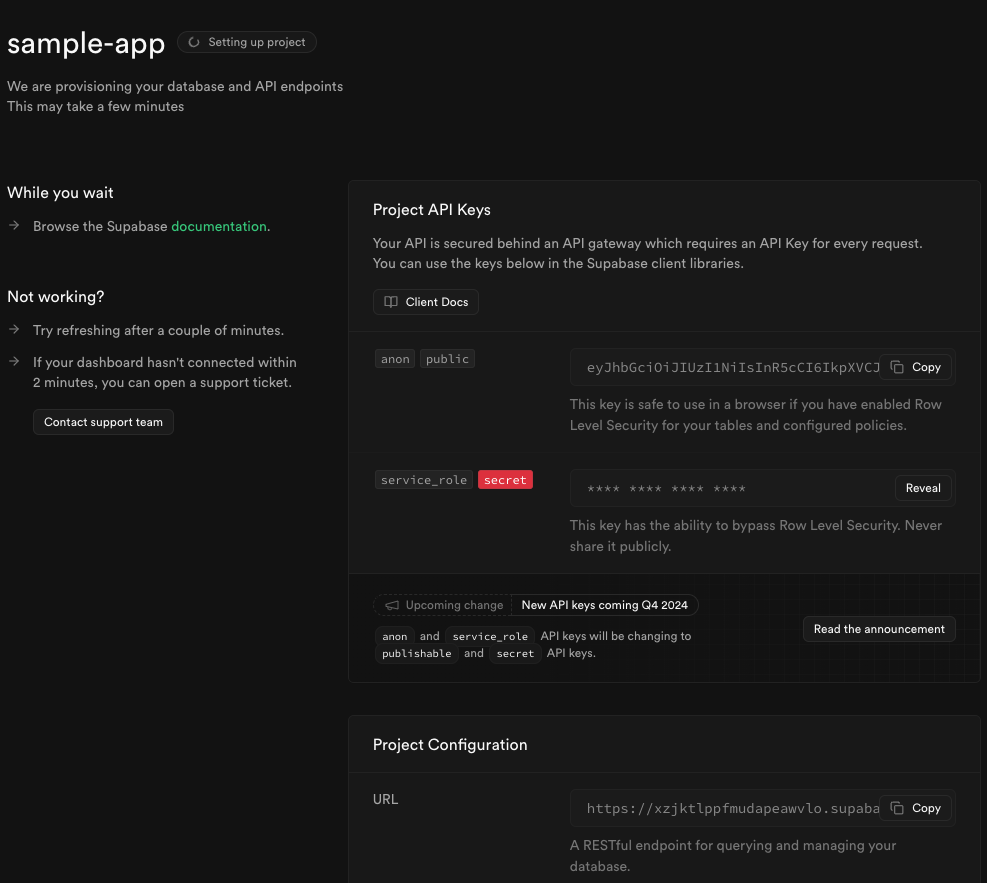
Now we need to set up the environment variables one by one. Start with Supabase. Copy the URL and ANON KEY and paste them into the .env file.Warning 1: Don’t forget to check .env file in the .gitignore file.
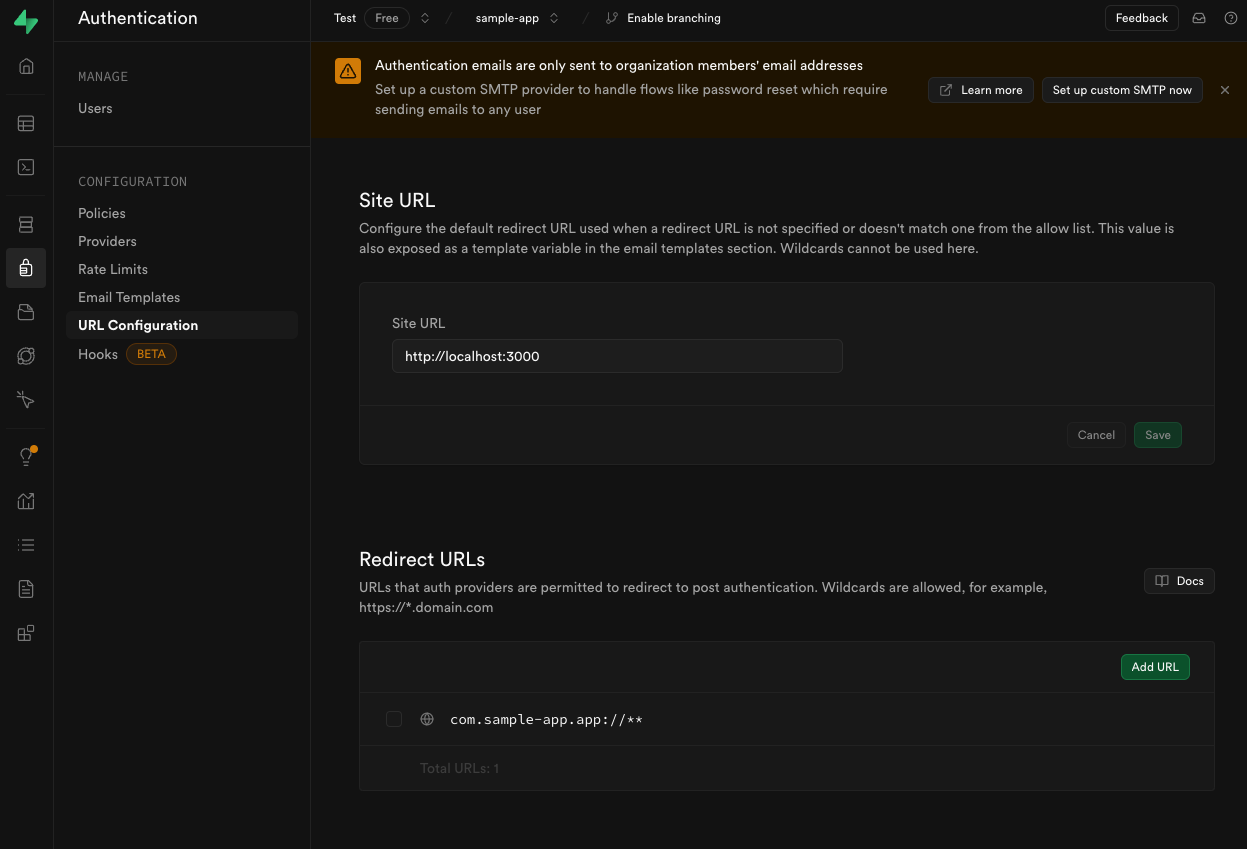
Warning 2: I strongly recommend to set up your own SMTP server. For example: Brevo. It is free up to 300 emails per day.I am using it in all my projects.
Now go to the Authentication section and add your app id: like: com.shipmobilefast.app. Now open your codebase and let’s start.
- Open your terminal and run the following command:
Get started with Expo Go.
Or you can create a development build with EAS & prebuild.
Open your codebase and run the following command: (step 10-11-12 for development build) Add this code into eas.json file: "build": {
"development": {
"developmentClient": true,
"distribution": "internal",
"ios": {
"simulator": true
}
},
Now run the following command again:eas build --profile development --platform ios
npx expo prebuild
npx expo run:ios // or npx expo run:android
Now your app is ready to be built. 🎉 Troubleshooting
If you don’t set your Supabase URL and ANON KEY in the .env file, your app will crash.
Watchman Error
If you are using macOS, you can also install watchman using Homebrew.


